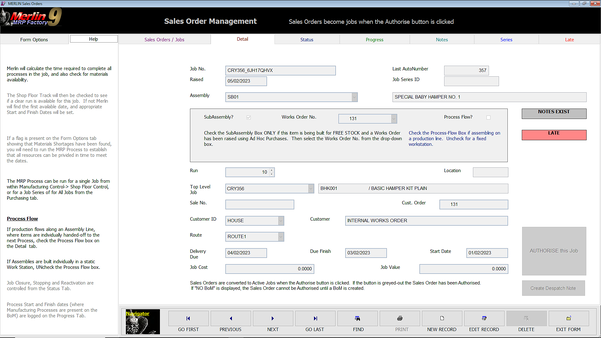
Merlin Sales Orders & Jobs
Need some help? That is what we are here for!
Creating and Managing Sales Orders, and AUTHORISING them for Manufacture.
< Back to COLLEGE HOME
Of course, when setting up your first Sales Order & Job, the list will be empty. Of note here is the Traffic Light Status Warning System. In the Job No. column, amber indicates the Job is in Production, and red indicates that it is behind schedule. The highlighting of the Allocated and Picked columns draws attention to the fact that these have not been done (See Shop Floor Control).
Please note the Form Options tab to the left, which gives information about creating a Job Series, which can save you a lot of time with Linked Jobs. More on this later.
This takes you to Step 2.
Click the NEW RECORD button, and you will be taken to the Input Screen.
Enter the information as required. The Job No. will be autocreated by the Merlin MRP System, as will the Raised Date. Select the Assembly you wish to build from the drop-down menu, which will list all of the Assemblies for which you have created a Resource Record Card. Tab to the next field, which is where your specify the Job Series, if you wish to link Jobs together for Group Processing, which is a big time-saver.
On the screen to the right or below, all the input data has been entered. Merlin has entered Logical Start, Finish and Delivery Dates according to the Assembly Definition or BoM data, but has found a Production Line Conflict on the Track or Work Station you have specified, and presented the Warning Screen that you see here, itemising the conflict(s). Having studied this to identify the problem, click the OK button, and Merlin will offer to set a Viable Production Schedule. Say Yes to this, and you will be offered a Revised Production Schedule.
Click Yes to this and your Start, Finish and Delivery Dates will be updated with the new values. You can, of course, choose to keep the desired Production Schedule, and Reschedule the Conflicting Job(s), depending upon your priorities.
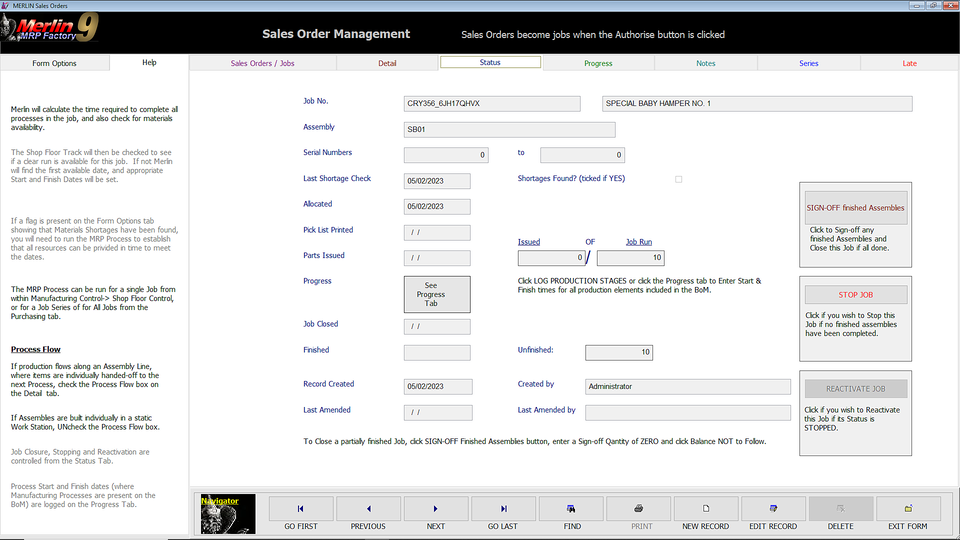
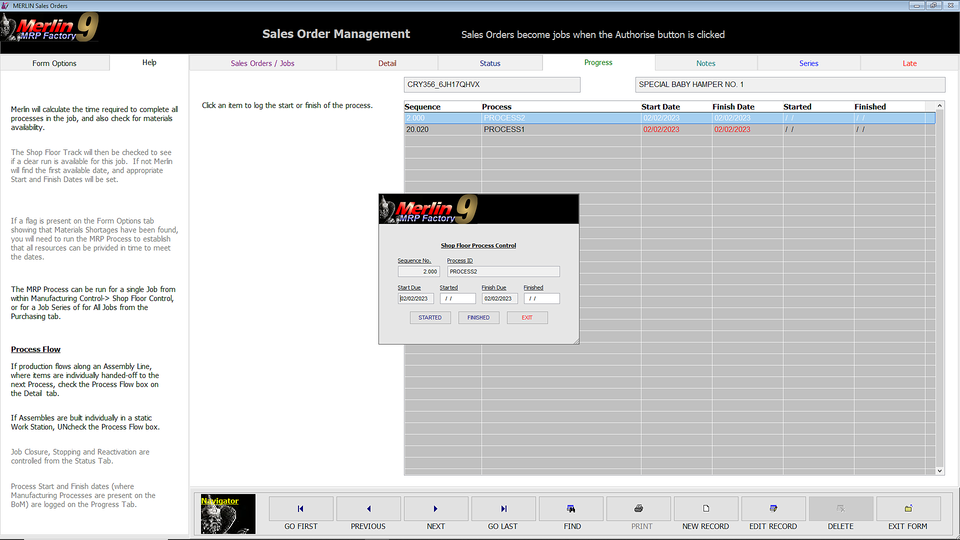
At this point you will have Created a Sales Order, which will not yet be an Active Job. When ready, which may be now, click the AUTHORISE this Job button and your Sales Order will become an Active Job. In case anything has changed, the AUTHORISE this Job button will again check for Production Line Conflicts.
This takes you to Step 3.
Assuming you have Authorised your Production Job, your Sales Order Management screen should now look like this. The Create Delivery Note button comes to life when Finished Assemblies have been Signed Off into Stock, and will take you to the Despatch Office, more of which later.
This takes you to Step 4.
You can see at a glance what has been done and when, and what remains to be done. Here, the Kit has been Allocated to the Job by the Merlin MRP System or in Shop Floor Control but the Pick List has not been printed, and no Materials have been Issued. Note, you can Part Issue Materials if you so wish for any quantity of Assemblies within the Production Run and Issue the balance later. You can see the Status of Issue on the screen.
To progress the Job, go to Shop Floor Control, Button 5 on the College Home Screen, which we cover fully in the next Tutorial.
The buttons to the right on this screen will allow you to SIGN-OFF Finished Assemblies, and the prompts will ask how many you wish to Sign-off, whether to Enter them into Stock, and whether the Balance is to Follow if this quantity is less than the scheduled total for the Job Run.
The next button down allows you to STOP THE JOB, if you need to do so for any reason, and it will Return Unused Material to Stock.
The final of the trio of buttons is to REACITVATE JOB if you need to do so. You may have Stopped the Job in order, for example, to Revise the BoM, and having done so now wish to Reactivate it.
Since only Administrators can access Sales Order Management, once a Sales Order has been Authorised for manufacture, these steps are more usually carried out on the Job Control screen which is very similar, but does not permit the creation of new Sales Orders & Jobs.
Next, proceed to Step 5.
You will see the Job Progress List here only if you have Process or Labour items on your BoM for this Assembly. The list of Manufacturing Processes is sequenced according to how you arranged them in the BoM Manager.
If you have not included Production Items or Manual Processes on your BoM, this screen will be blank other than an advisory note to this effect.
This is perhaps more normally carried out in Shop Floor Control, though the choice, of course, is yours, and is covered in more detail in that section of the Merlin College, but is included here so as not to leave an unexplained gap.
Click on the (first or) the next process in the list which has been Started or Finished, and proceed to Step 6.
If this Manufacturing Process has just Started, or is about to be Started today, just click the STARTED button, and today's date will be entered by Merlin. Accept, or enter the date when it did actually Start, and then click the STARTED button.
If the Manufacturing Process has been completed, using the same logic, accept today's date, or enter date if not today's, and click the FINISH button.
Repeat this until all of the Manufacturing Processes have Started and Finished. You will not be able to Sign-off Finished Assemblies until all of the Manufacturing Processes have been completed.
If you do not have Manufacturing Processes in your BoM, none of the above applies and you will not need to follow this procedure.
The Notes tab is for antering any notes or data about this Job. The Series tab lists Jobs in the same Job Series if this Job is included in a Series, and the Late tab lists Jobs that are behind schedule.
Any Questions? Please contact us on the Merlin HelpDesk.
< Back to COLLEGE HOME